Before you make the first stitch
Hand sewing takes little equipment: a needle, thread, scissors and a few fabric scraps are enough to begin. Choose a needle that passes through your fabric without force. Cut a comfortable length of thread rather than an armful; shorter thread is less likely to tangle. For practice, use a light-colored, closely woven fabric and a contrasting thread so you can see where each stitch lands.
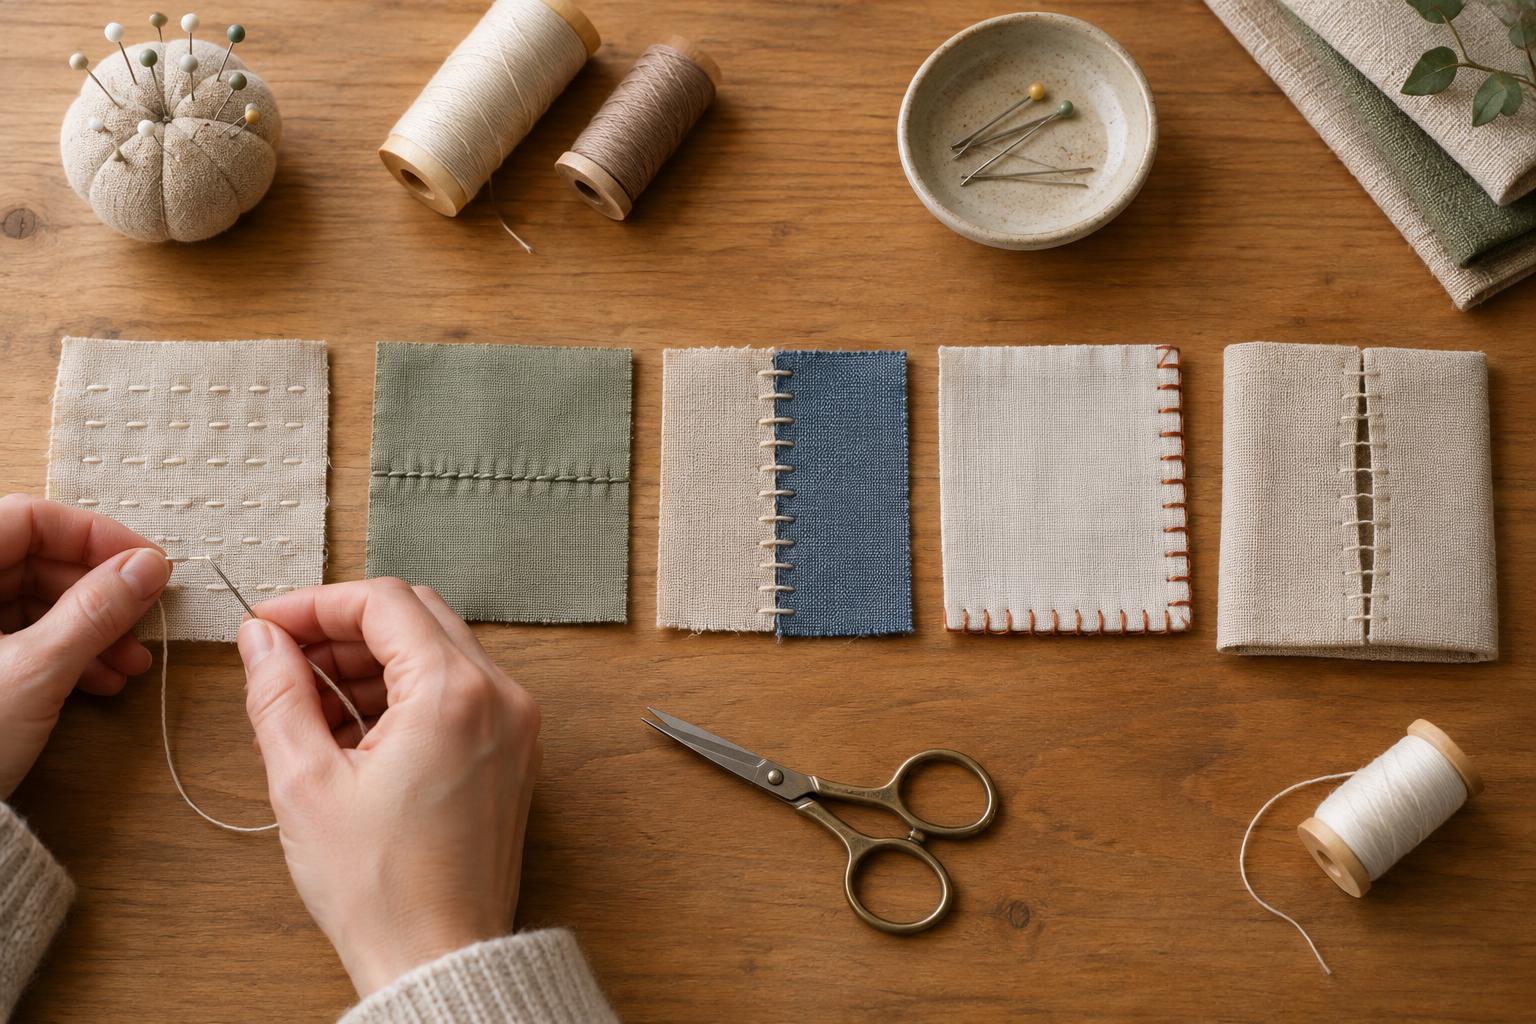
Thread the needle and tie a small knot at the far end of the thread. On a project, try to start and finish on the inside or back, where the knot will be less visible. Keep the fabric flat as you sew, and pull each stitch snug without making it pucker. A pencil line on a practice scrap can help you learn to sew straight. The five stitches below cover temporary holding, sturdy seams, joined edges and neat closures.
Running stitch: the simple all-rounder
A running stitch is a line of small dashes. Bring the needle up through the fabric, move it a short distance forward, and push it back down. Bring it up again a similar distance farther along the line. Repeat, aiming for reasonably even stitches and gaps. Once you are comfortable, you can load several stitches onto the needle before pulling the thread through.
Use short running stitches for light-duty seams or decorative lines. Make the stitches longer when you need to hold two pieces temporarily before sewing a stronger seam; this is called basting. Running stitch is quick, but it is not the best choice for a seam that will take a lot of strain. If the fabric gathers when you do not want it to, ease the thread back until it lies flat.
Backstitch: a stronger hand-sewn seam
Backstitch makes a firm, nearly continuous line and is useful for seams that need to hold together during regular handling. Start by bringing the needle up on your marked seam line. Take one stitch forward, pushing the needle down, then bring it up another stitch-length ahead. Insert the needle back into the end of the previous stitch. Bring it up ahead again and continue, always sewing backward to meet the last stitch.
Try to keep the stitch lengths consistent. Large gaps on the front mean the needle has not gone back far enough; tiny, crowded stitches may waste time without improving the seam. Practice on two fabric scraps with their intended outer sides facing each other. After sewing, open the scraps to see how neatly the seam holds.
Whipstitch: joining edges quickly
Whipstitch passes over the edges of fabric, making it handy for joining two folded edges or attaching a small fabric piece by hand. Place the edges together and bring the needle out near them. Carry the thread over both edges, insert the needle through the layers again, and repeat along the join. The thread will form a series of diagonal wraps.
Keep each wrap a similar distance from the edge so the fabric does not pull unevenly. Whipstitch is often visible, so choose matching thread when you want it to blend in or contrasting thread when the wraps are part of the design. Avoid placing stitches so close to a fraying edge that the threads pull loose.
Blanket stitch: a decorative edge finish
Blanket stitch creates a row of upright stitches with a line of thread along the fabric edge. It is especially useful on felt and other fabrics that do not fray readily, where it can both join pieces and decorate their outline. Bring the needle up near the edge. Move forward, insert the needle at the same depth from the edge, and bring its tip out at the edge. Before pulling the needle through completely, pass it through the loop of thread beneath the tip. Pull gently to settle the loop along the edge.
Repeat at even intervals, keeping the thread under the needle tip each time. If a loop slips away, undo that stitch and try again rather than tightening a loose strand. Blanket stitch adds a tidy finish, but it does not replace a suitable hem or seam finish on every fraying fabric.
Ladder stitch: closing an opening discreetly
Ladder stitch is useful for closing the small opening left after turning a stuffed project right side out. Fold both raw edges inward and press them with your fingers. Hide your starting knot inside the opening, then bring the needle out through one folded edge. Take a small stitch inside the opposite fold, followed by a small stitch inside the first fold. Continue alternating sides. Before tightening, the thread between the folds looks like the rungs of a ladder.
Pull the thread gently every few stitches to draw the edges together. Pulling too hard can bunch the fabric or leave a dent. To finish any of these stitches, make a couple of small stitches in place on the hidden side and trim the thread. Practice each technique on scraps first: learning where the needle should emerge is easier when you can focus on the stitch rather than protecting a nearly finished project.


