Choose and prepare your T-shirt
An old T-shirt can become soft, sturdy yarn for baskets, mats, plant-pot covers, and other household projects. Choose a shirt made mostly from stretchy knit fabric. Fabric without bulky prints, pockets, or thick decorative stitching is easiest to cut and work with. Small holes are manageable if you can cut around them; badly weakened fabric may tear when stretched.
Wash and dry the shirt first, then lay it flat on a large cutting surface. You will need sharp fabric scissors or a rotary cutter and mat, plus a ruler if you want to mark your cuts. Smooth out wrinkles without pulling the fabric out of shape. If the shirt has side seams, keep an eye on their position as you work: they will remain in the yarn and may form small, noticeable joins.
Make a fabric tube
Cut straight across the shirt just below the sleeves, removing the upper portion. Cut off the bottom hem as well. You should now have a tube of fabric with two open edges: the former shirt bottom and the new cut edge at the top. Set aside the sleeves and upper portion for smaller scraps or other projects.
Lay the tube flat so its two side folds sit at the left and right. Smooth both layers together, but do not stretch them. Choose one side fold to remain connected; this will be the narrow band that lets you turn many short strips into one continuous strand. If there is a side seam at that fold, the band can still be cut, though a bulky seam may be easier to handle with scissors than with a rotary cutter.
Cut even strips without cutting through the band
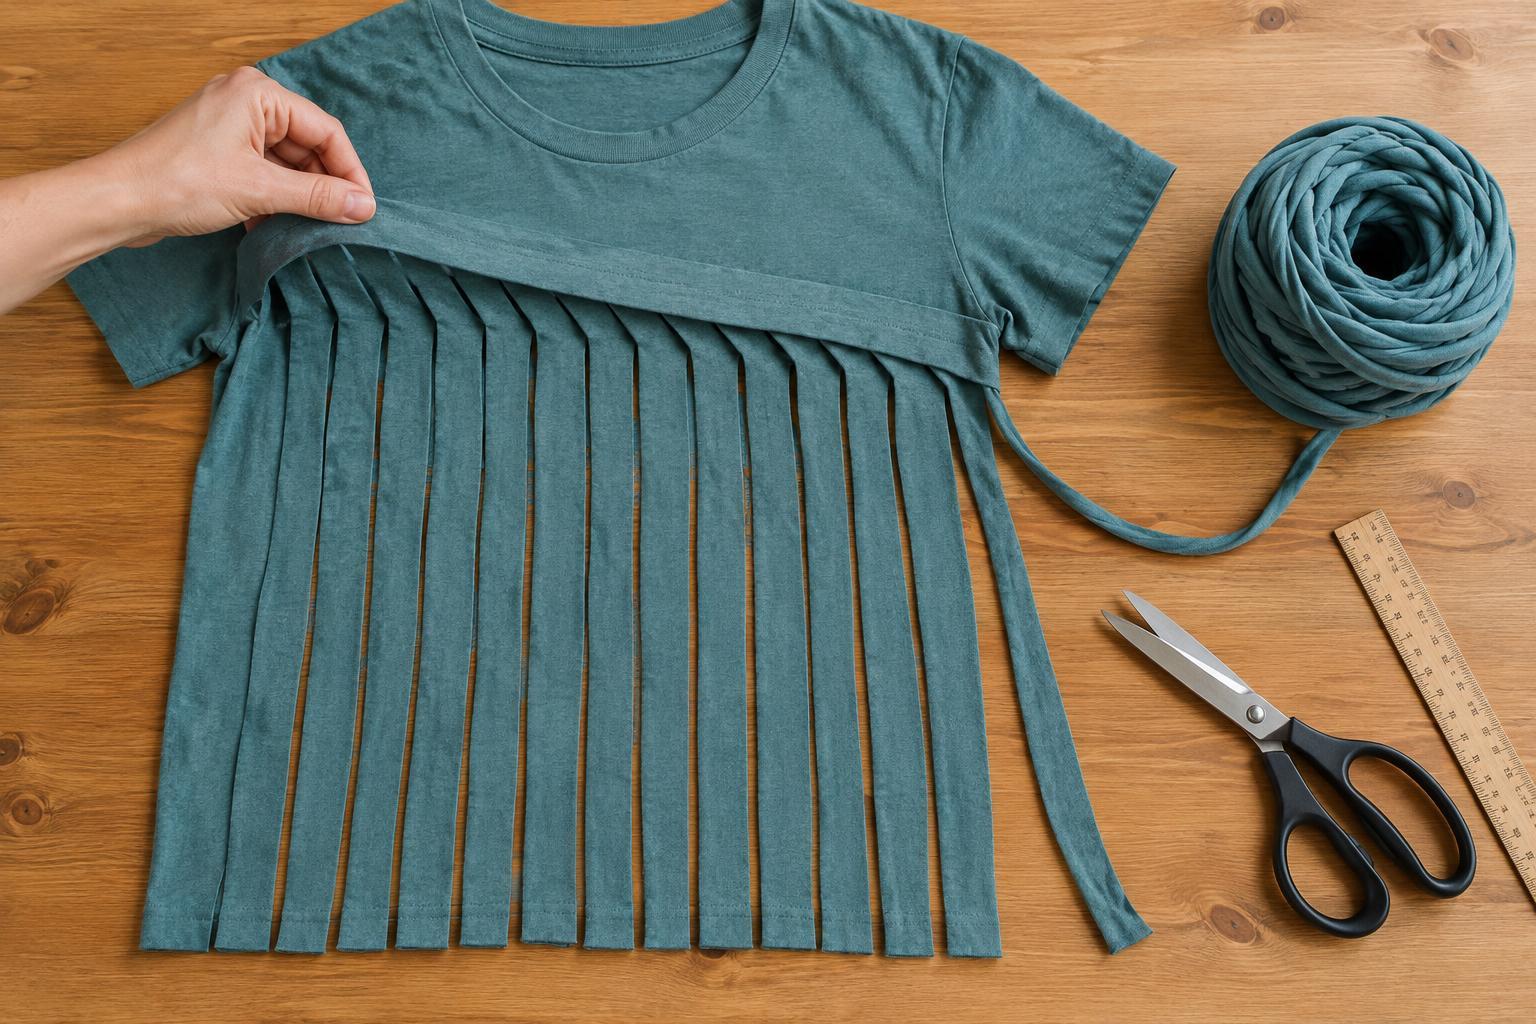
Starting at the opposite side fold, make cuts across both layers of the tube toward the side you chose to keep connected. Stop each cut about 2–3 cm before that fold. Space the cuts evenly, about 2–3 cm apart for a useful general-purpose yarn. Narrower strips tend to make lighter yarn; wider strips make a bulkier strand. Keep the scissors roughly parallel to the tube’s open edges as you work.
The uncut band is essential. If you cut all the way through it, you will make separate loops instead of a continuous strand. Pause after the first cut and lift the fabric to check that the band is still intact. Continue cutting toward the opposite open edge, keeping your spacing as consistent as practical. Slight variations are usually fine, but very narrow spots may break when you stretch the yarn.
Turn the fringe into one long strand
Open out the tube so you can see the intact band clearly. You can lay it flat in a single layer or slip an arm through the tube to hold the band away from the fringe. The short slits now run toward the band from around the other side of the tube. Do not simply cut straight across the band at each slit: that would separate the loops.
Instead, make diagonal cuts that shift the connection down by one strip each time. Start at the top open edge of the band and angle your cut to the first slit end. Then work down the band, connecting a slit end on one side to the next slit end one row lower on the other side. Finish by cutting from the final slit end to the bottom open edge. Follow the resulting strand with your fingers before pulling it free; if you find an attached loop, check the band for a missed diagonal cut.
Finish and use your T-shirt yarn
Gently stretch the strand in short sections. On many jersey knits, this encourages the cut edges to curl inward and makes the yarn feel rounder. Pull lightly at first, especially near worn areas or seams, and stop if a thin section starts to split. Wind the finished yarn into a loose ball so it does not tangle. Its thickness will depend on the fabric as well as the width of your cuts, so yarn from two different shirts may behave differently.
Try a small test project before committing to a large one. You can braid the yarn into a coaster, weave it through a simple cardboard loom, or crochet it with a hook that lets you form stitches comfortably. If the yarn feels too bulky, cut narrower strips on your next shirt. Save the first finished ball as a guide to the width and fabric you prefer.


