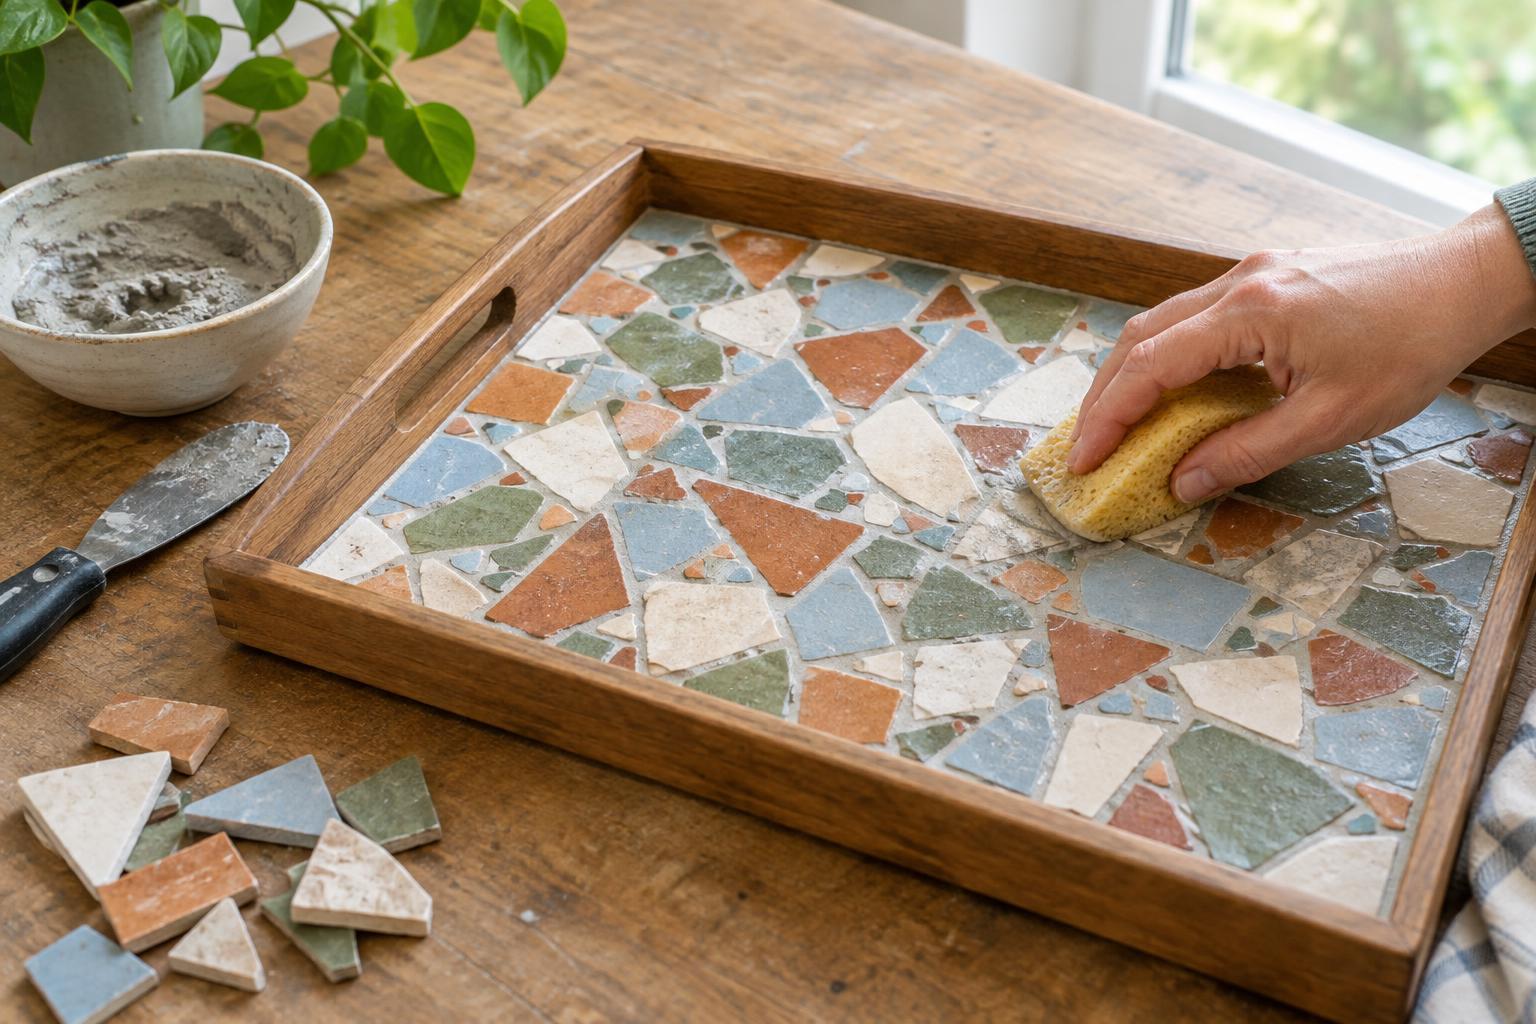
Choose a tray and gather your materials
A mosaic adds color and texture to a plain tray, but tile and grout also add weight. Start with a rigid tray that has a flat bottom, secure handles and sides tall enough to contain the finished mosaic. A wooden tray can work for a decorative project kept indoors, provided it does not flex when lifted. Avoid a thin tray that bends under the weight of the tiles; movement may loosen pieces or crack the grout.
Gather small ceramic tile pieces, an adhesive labeled as suitable for both your tile and tray surface, and grout appropriate for the joint width you plan to use. You will also need a pencil, paper, a ruler, a spreading tool, a grout float or flexible scraper, a sponge, clean cloths and a container for mixing grout. Check the adhesive and grout instructions before buying: products vary in their surface preparation, working time and curing requirements.
Smooth-edged pieces are easiest to arrange. If you need to break or trim tiles, wear eye protection and use tile nippers as directed by their manufacturer. Handle cut edges carefully and keep fragments contained. Do not use pieces with sharp edges where hands will grip the tray.
Prepare the base and plan the pattern
Clean the tray bottom so it is free of grease, dust and loose finish. If it has a glossy coating, the adhesive may need a lightly scuffed surface or a compatible primer. Follow the adhesive maker’s guidance rather than assuming it will bond to paint or varnish. Protect any parts of the tray you do not want to grout, including the handles and outer sides.
Measure the inside of the tray and draw its outline on paper. This gives you a place to try layouts without repeatedly moving pieces across a glued surface. A border of similar-sized tiles can frame an informal arrangement in the center. Lay the pieces out inside the actual tray as a final check, leaving consistent spaces for grout and a small gap at the tray’s sides. Avoid forcing large pieces into corners, where an uneven fit is especially noticeable.
Take a photograph of the dry layout or work in small sections so you can recreate it as you glue. If some tiles are much thicker than others, swap them for pieces of similar thickness. A level surface is easier to grout and more useful when the tray is carrying objects.
Glue the tile pieces in place
Spread or apply adhesive according to its instructions, working on only as much of the tray as you can cover before it begins to set. Press each tile into place without pushing it so far down that adhesive fills the grout spaces. If adhesive squeezes up between tiles, remove the excess while it is still workable; grout needs room to sit between the pieces.
Continue from one side of the tray to the other, checking that the pattern stays aligned and the gaps remain reasonably even. Do not worry if every space is not identical: a handmade mosaic can accommodate variation. What matters more is avoiding gaps too narrow to grout and clusters of tiles so close together that their edges touch.
Leave the tray flat and undisturbed for the adhesive’s specified curing period. Grouting too early can shift the pieces and weaken the bond. Before moving on, gently check that each tile is secure.
Apply grout and clean the surface
Put on gloves and mix the grout as directed on its packaging. Add liquid carefully rather than making the mixture too runny; grout that is difficult to control can slump out of the joints. If you use a dry grout mix, avoid breathing its dust while measuring and mixing. For porous or unglazed tiles, test your cleaning method on a spare piece first, because grout pigment may be harder to remove from their surfaces.
Press grout across the tiles at an angle, working it into the spaces. Scrape away excess without digging into the joints. After the grout has firmed up as directed, wipe the tile faces with a slightly damp sponge, rinsing the sponge often. Too much water or heavy scrubbing can pull grout from the gaps. Once a light haze appears on the tile, buff it away with a soft cloth at the time recommended for your grout.
Let the grout cure before using the tray. Collect leftover grout and cleaning residue for disposal according to the product directions rather than washing thick grout slurry down a drain.
Finish and care for your mosaic tray
Inspect the finished surface for rough tile edges, loose pieces or gaps that need attention. If a grout sealer is suitable for your project, apply it only after the grout has cured and according to the sealer’s instructions. Sealer can help with routine cleaning, but it does not turn a wooden tray into a waterproof surface.
Use the tray for dry decorative items or for carrying objects that sit securely on its surface. Keep unwrapped food off the mosaic unless every material used is specifically intended for food contact. Wipe the tray with a damp cloth rather than soaking it, and lift it by both handles so the added weight stays supported. With a sturdy base and careful preparation, the pattern can remain the focus long after the last grout haze is gone.


