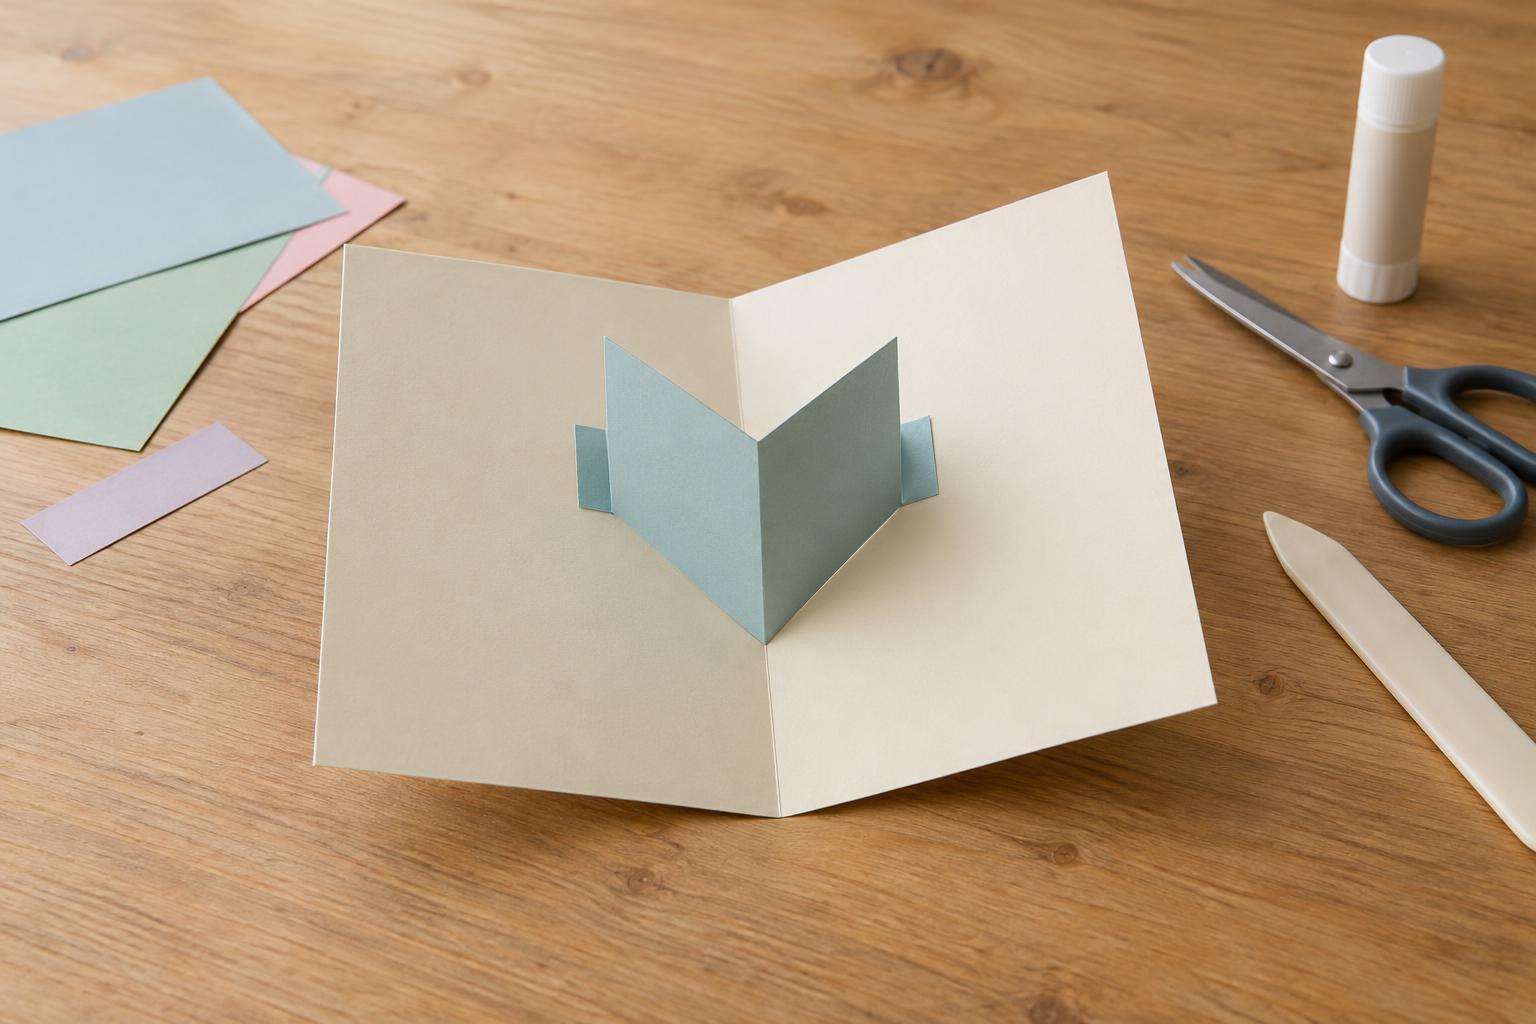
What a V-fold does
A V-fold is a separate folded shape attached to both inside panels of a card. When you open the card, the shape rises; when you close it, the shape folds flat between the panels. It is an approachable way to add a pop-up because you can make and test the moving piece before decorating it.
For this project, the pop-up will be a small triangular shape with a crease down its center and a glue tab along each lower edge. Once the mechanism works, the triangle can become a birthday cake slice, a flower, a little house, or a backdrop for a paper message.
Gather materials and plan the size
You will need a sheet of cardstock for the card base, a smaller piece of medium-weight paper or lightweight cardstock for the pop-up, a ruler, pencil, scissors, and a glue stick or a small amount of craft glue. A blunt scoring tool, such as an empty ballpoint pen, can help you make neat folds. Work on scrap cardboard if you are scoring with a firm point.
Fold the card base in half and crease it firmly. Keep your first pop-up modest: a shape about half as tall as the inside of the closed card leaves room for small placement errors and later decoration. Avoid heavy layers or bulky embellishments on the moving piece. They can make the card difficult to close or pull its tabs loose.
Cut and fold the pop-up piece
Fold the smaller piece of paper in half. With the fold on your left, draw half of a wide triangle: start at a point near the top of the fold, draw outward toward the lower right, and finish with a short bottom edge leading back to the fold. Cut through both layers along the outline, leaving the folded edge intact. Open the shape to check that both halves match, then close it again. The center crease is the fold that will let the piece collapse.
Create a glue tab about 1 cm deep along the bottom edge of each half. Score where each tab meets the main shape, then fold the tabs backward so they sit behind the triangle. Make a small cut through the tabs at the center crease so the left and right tabs can move independently; do not cut up into the visible part of the triangle. Trim the outer corners of the tabs if they extend beyond the shape.
Attach the V-fold and test the motion
Open the card flat. Hold the pop-up over the inside with its center crease near the card’s center crease. Set one tab on the left panel so its fold line runs diagonally away from the card crease, forming one arm of a V. Keep the entire pop-up within the card’s edges. Before gluing, gently fold the card shut while holding that tab in place. Move the piece if it catches or protrudes.
Glue only the underside of the left tab and press it in place. Fold the pop-up flat against the left panel. Put glue on the exposed underside of the free tab, then carefully close the card so the right panel meets it. Press the closed card for a moment, open it slowly, and let the glue dry. This closing step positions the second tab to match the first without requiring you to guess its angle.
Open and close the card several times before adding decorations. If the pop-up snags, check for a corner extending past the card’s edges or a tab glued beyond its fold line. A tab that lifts may need a little more glue and drying time. If the mechanism is badly misaligned, make a fresh pop-up piece rather than forcing the card shut.
Decorate without blocking the fold
Draw or glue a lightweight image onto the front of the pop-up, keeping the center crease free to bend. You can add a short message across the two halves, but leave a little space at the crease so the letters do not disappear into it. Decorate the background of the card separately with paper shapes, stamps, or colored pencil.
Check the card once more after each added layer. Glue should not spread onto the card’s center crease, and raised decorations should not press against the opposite panel when the card is closed. A successful pop-up does not need to rise dramatically: smooth opening, clean folds, and a card that closes flat make the finished project satisfying to give.


