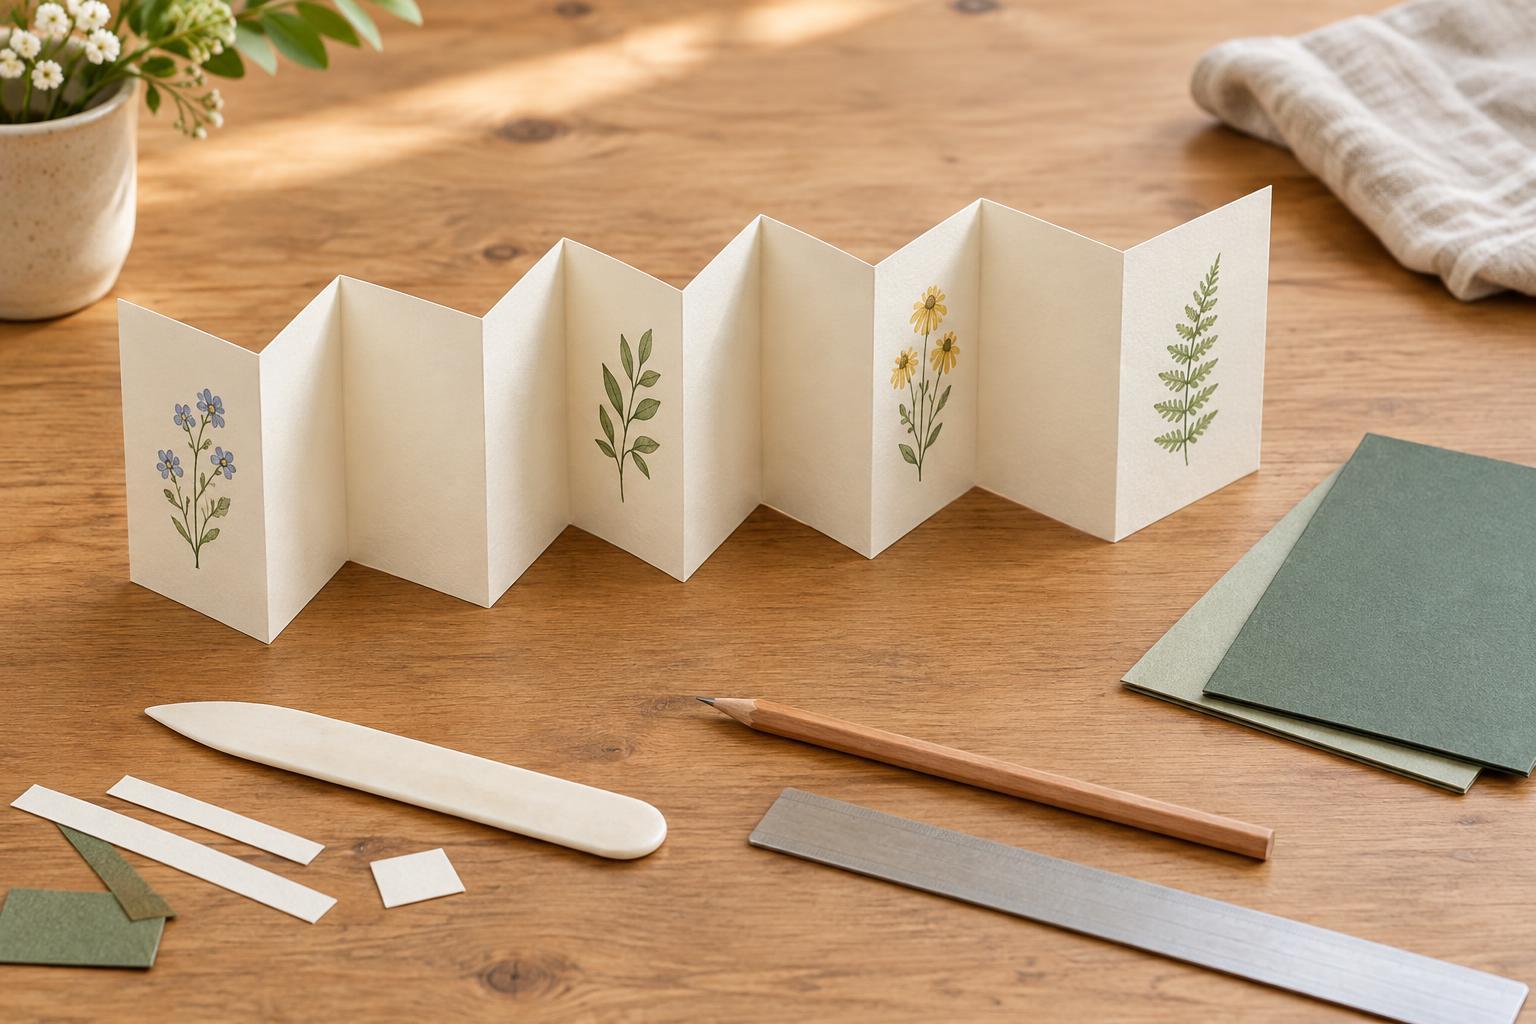
Plan the size and gather your materials
An accordion-fold booklet is a long strip of paper folded back and forth into connected panels. It can hold a short story, a sequence of drawings, a collection of patterns or a small display of photographs. Unlike a booklet with a spine, it can be read one panel at a time or opened out to show the whole strip.
For a simple three-panel booklet, use a sheet of paper about 10 cm wide and 29.7 cm long. A strip cut lengthwise from A4 paper works well. Ordinary printer paper is easy to fold; slightly heavier drawing paper gives the finished booklet more structure. Very thick card is harder to crease neatly, so save it for optional covers. You will also need a ruler, pencil and scissors or a craft knife. If you use a knife, work on a cutting mat.
Decide which way the booklet will be read before adding words or pictures. You can make a continuous scene across all the panels or give each panel its own subject. A quick pencil sketch on scrap paper helps you plan what belongs on the front and what will appear when you turn the booklet over.
Measure and fold even panels
Lay the strip horizontally. For a strip 29.7 cm long, make small pencil marks at 9.9 cm and 19.8 cm along both long edges. These divide it into three equal panels. Align a ruler between each pair of marks and draw a faint guide line if that makes the folds easier to place. For a strip of another length, divide its length by the number of panels you want, then mark each interval.
Fold the first panel over the middle panel at the first mark. Match the top and bottom edges before pressing the fold, then run a fingertip or the edge of a ruler along the crease. Fold the last panel in the opposite direction at the second mark. Viewed from the side, the strip should make a zigzag rather than curl around itself.
Open and close the booklet a few times. Its panels should stack without forcing the paper. If a fold is slightly uneven, reopen it and gently adjust the crease before pressing it flat again. A sharply creased fold is useful, but pressing too hard with a tool can scuff or tear softer paper.
Add pictures and words
Open the booklet on your work surface and lightly label the panels in pencil while you work. Check the reading order by folding the strip closed, opening it from your chosen front panel and turning it over. This small test prevents a title or final page from ending up on the wrong side.
Draw or write with the booklet open when you want an image to continue across several panels. Leave a little space beside each fold so important words and faces do not disappear into the crease. For individual pages, keep text comfortably inside each panel’s edges. Pencil guidelines can help you keep lettering straight; erase them only after any ink has dried.
Try coloured pencils, stamps, cut-paper shapes or small pieces of patterned paper for decoration. Use a light touch with wet paint or glue: moisture can make thin paper buckle and may cause folded panels to stick together. If you decorate both sides, let the first side dry completely before turning the strip over. Then refold it to check that the design still makes sense.
Make optional covers
Covers can protect a booklet that will be handled often. Cut two pieces of lightweight card just a little larger than one folded panel. For panels measuring about 9.9 by 10 cm, covers around 10.5 by 10.5 cm leave a narrow border. Test their position before applying adhesive: one cover belongs on the outside of the first panel, and the other on the outside of the last.
Spread a thin, even layer of glue on each cover or use double-sided tape. Attach the covers without covering the folds, then close the booklet and check that its edges line up. If you used glue, place the closed booklet beneath a light weight while it dries, with scrap paper protecting your work surface and any artwork. Too much glue can wrinkle the paper or seep between panels.
A cover is optional. If you want the booklet to stand open as a display, the uncovered version may be lighter and easier to arrange. You can also decorate the outer panels as covers without adding card.
Adapt the booklet for your project
Once you can make even folds, experiment with a longer strip and more panels. Measure its full length first and choose a panel width that divides it evenly. To join strips, overlap their ends slightly and secure the overlap with glue or tape before measuring the finished length. Keep the join away from a planned fold where possible; the extra thickness can make that crease bulky.
For a travel sketchbook, leave panels mostly blank. For a greeting booklet, put a message on each panel and a title on the outside. A narrow strip can become a display of repeating shapes, while a wider one gives you room for detailed drawings. Whatever the theme, accurate measurements and alternating folds do most of the structural work. Test the booklet closed and fully open before calling it finished.


