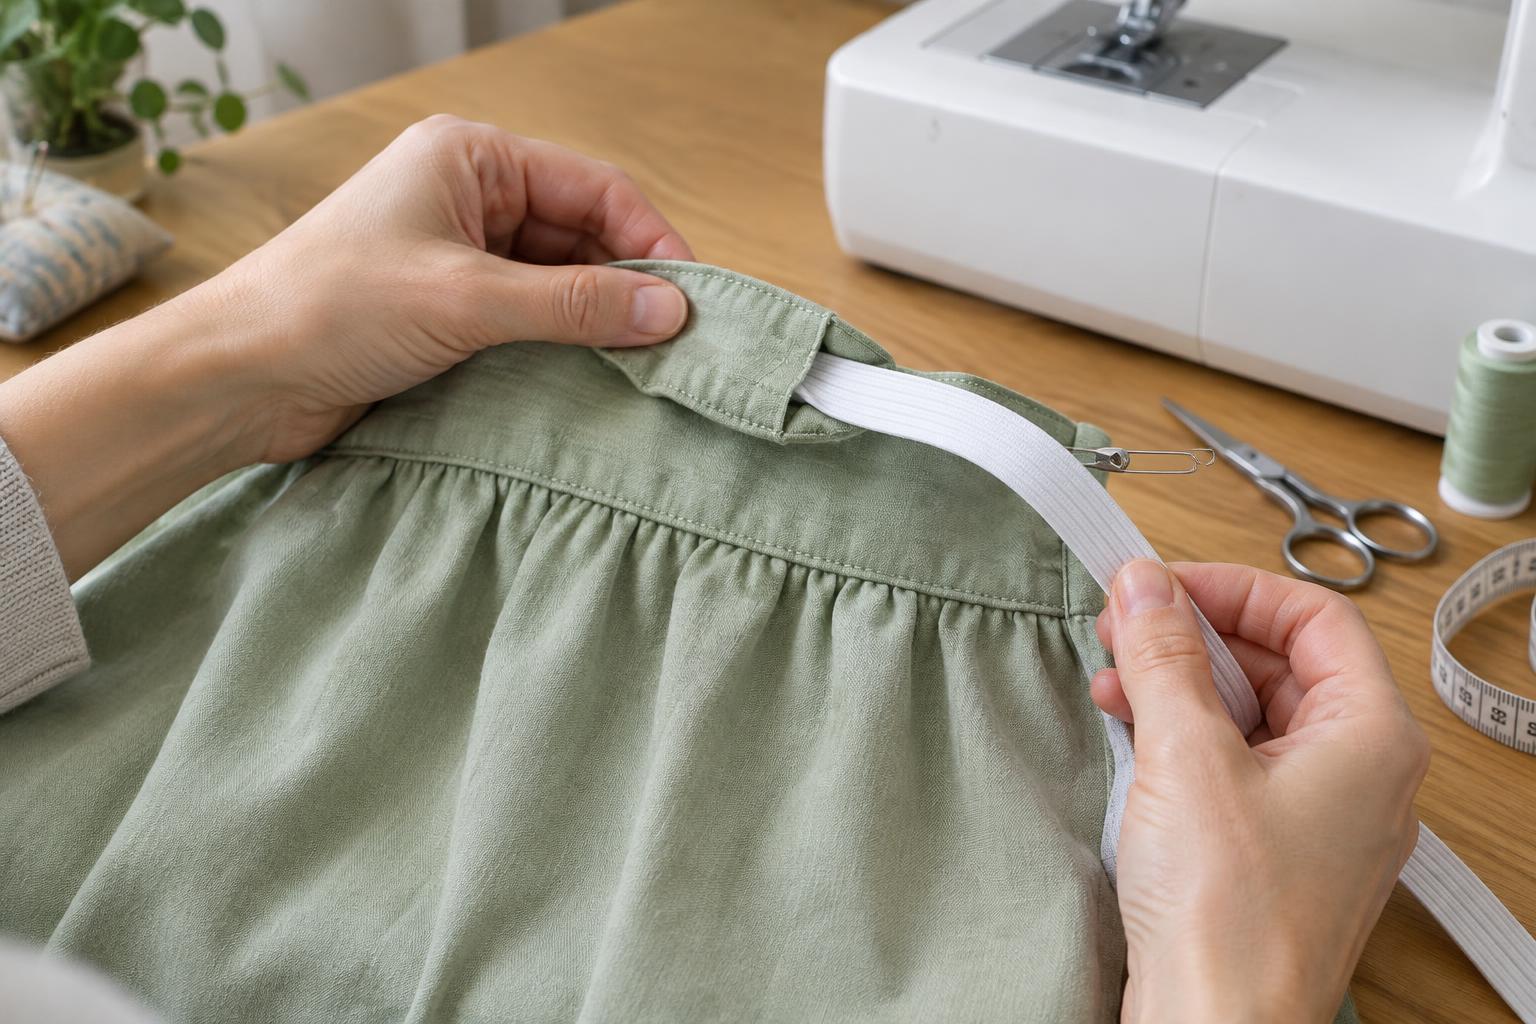
Choose your fabric and plan the casing
A casing is a fabric channel that holds elastic at the waist of a skirt, pair of shorts, or simple trousers. Because the elastic can move inside the channel, this method is useful when you want to adjust the fit before closing the waistband. It also lets you replace worn elastic later if you leave the closing stitches accessible.
Choose an elastic width that suits the garment. Narrow elastic works for lightweight fabric, while wider elastic can give a fuller garment more support. Before cutting your fabric, check that the pattern includes enough extra height above the intended finished waist edge for the casing. If it does not, add it when cutting. For a double-fold casing, allow for a narrow first fold, a second fold slightly deeper than the elastic is wide, and a little room for stitching. For example, 2.5 cm elastic could use a 1 cm first fold and a 3 cm second fold, requiring about 4 cm of fabric above the finished edge.
Prepare the garment and elastic
Finish the garment’s side seams and any other seams that must be sewn before the waistband. Press those seams open or to one side as appropriate. If the fabric frays easily, finish the seam allowances so loose threads are less likely to catch on the elastic. Check that the top edge is even, and mark the side seams with pins or removable fabric marks; they will help you distribute the gathers later.
Wrap the elastic around the intended waist position and adjust it until it feels secure but comfortable when you sit and move. Elastic varies in stretch, so use the actual piece rather than relying only on a measurement. Cut it with enough extra length at each end to overlap for stitching. If you are unsure about the fit, leave the elastic a little long: you can shorten it after threading it through the casing.
Fold and sew the casing
With the garment wrong side out, fold the top raw edge toward the wrong side by the amount planned for the first fold. Press it, then fold it down again by the planned casing depth and press once more. The raw edge should now be enclosed. Check the channel with a short piece of elastic before sewing: it should slide through without being squeezed, but the casing should not be so deep that the elastic twists easily.
Pin or clip the folded edge in place. Stitch close to the lower folded edge, working around the waist and leaving an opening of about 4–6 cm for threading. Sew slowly over bulky side seams, keeping the stitch line an even distance from the top fold. Do not sew across the channel or accidentally catch the garment’s outer layer in a tuck. If the fabric shifts as you sew, pause with the needle down and smooth the next section rather than pulling it through the machine.
Thread, join, and distribute the elastic
Attach a safety pin or elastic-threading tool to one end of the elastic. Feed it through the opening, bunching fabric over the pin and then pulling that fabric along the elastic. Keep hold of the free end; a second safety pin fastened to the garment can stop it disappearing into the casing. As you thread, feel for twists. Once the pin returns to the opening, lay the waistband flat and confirm that the elastic is not turned inside the channel.
Overlap the elastic ends and stitch them securely together, sewing back and forth or stitching a small rectangle through both layers. Take care not to stitch the elastic to the casing. Try on the garment before closing the opening. If the waist feels too loose, increase the overlap and resew the join; if it feels too tight, use a longer piece of elastic. When the fit is right, spread the gathers evenly around the waist.
Close the opening and check the finish
Tuck the casing edge back into place and stitch the opening closed along the same line as the earlier stitching. Keep the elastic pushed away from the needle. To reduce rolling, you can stitch a short vertical line through the casing and elastic at each side seam after the gathers are even. This holds the elastic in position, though it also makes later replacement a little more involved.
Check the waistband by stretching it gently and letting it recover. Look for an even top edge, a comfortable fit, and gathers that are not bunched in one spot. If the elastic will not slide during construction, the casing may be too narrow or a seam allowance may be blocking it; correct that before closing the opening. A few minutes spent pressing, checking for twists, and testing the fit will make the finished waistband neater and more comfortable.


