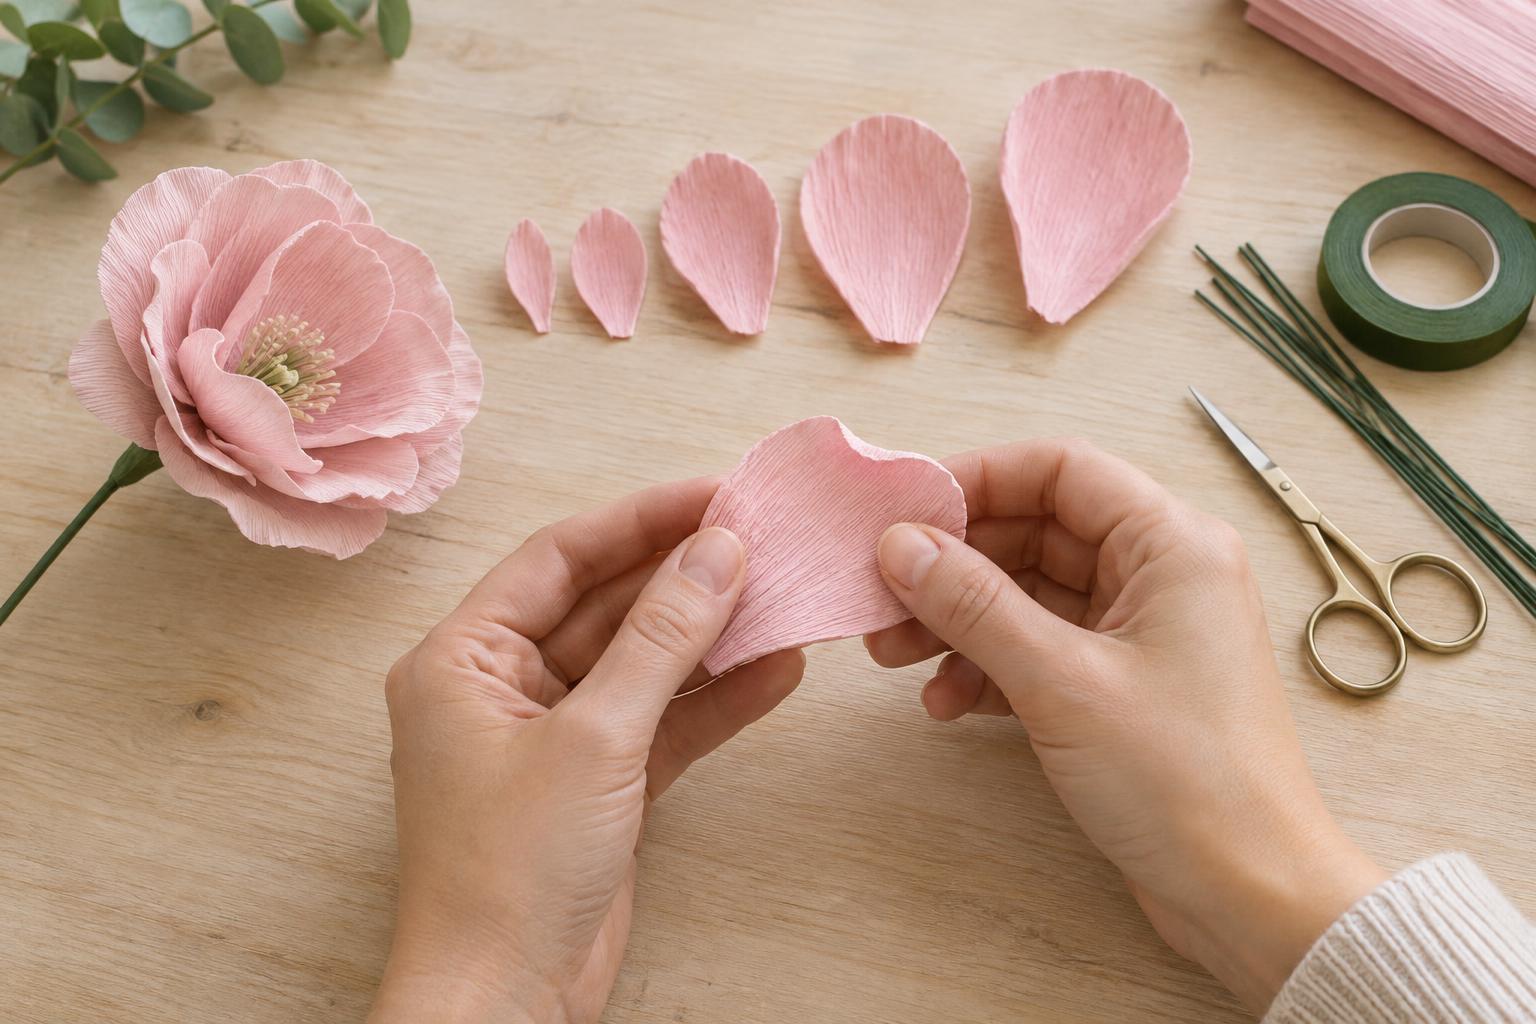
Choose materials and plan the flower
Crepe paper is useful for flower making because its fine folds allow it to stretch and hold a curve. Choose floral crepe paper rather than smooth tissue paper if you want petals with a cupped shape. Thicker crepe generally makes sturdier, more sculptural petals; lighter crepe gives a softer look but can tear more easily. For a first project, work with a single color so you can concentrate on the shapes.
Gather sharp scissors, a pencil, scrap paper for a template, a wooden skewer or pencil for curling, craft glue and a stem such as floral wire or a paper-wrapped skewer. If you use wire, bend or cover its cut end before handling the flower. Plan a simple bloom with a small center, a ring of shorter inner petals and a ring of larger outer petals. You can add leaves later, but finishing one flower first makes it easier to see how the petals work together.
Cut petals with the grain in the right direction
Before cutting, find the grain: these are the parallel folds running through the crepe paper. The paper stretches most readily across the folds. For most upright petals, place your template so the folds run from the petal’s base toward its tip. This lets you widen the middle of the petal by pulling gently from side to side without stretching the entire petal longer.
Draw a rounded teardrop template for the inner petals and a slightly wider version for the outer ones. A narrow base gives you a place to attach each petal without adding too much bulk. Fold the crepe loosely to cut a few matching petals at once, but avoid stacking so many layers that the paper slips under the scissors. Leave a little extra length at each base for gluing or wrapping. Petals do not need to be identical; slight differences can make the finished flower look less rigid.
Stretch, cup and curl each petal
Hold a petal with your thumbs near its middle and fingers supporting the back. Pull gently outward, moving your hands apart across the grain. Work gradually until the center forms a shallow cup. Leave the base mostly unstretched so it stays firm enough to attach. Test the motion on a spare piece first: once crepe paper has been stretched, it will not spring fully back.
For a softer outer edge, place a skewer along the upper edge and roll a small strip of paper around it. Ease the paper off and adjust the curl with your fingers. You can curl the two sides outward for an open flower or curl the tip inward for a bud. Avoid pulling hard at an edge that you have already stretched; it may become thin and tear. Shape the inner petals more tightly and the outer petals more broadly to give the bloom depth.
Build the flower from the center outward
Make a simple center by rolling a small piece of crepe paper into a loose bundle and gluing it to the top of the stem. Once it holds, place the first short petal against the center with its cupped side facing inward. Add another petal so it partly covers the first, then continue around the stem. Use a small amount of glue at each base and hold the paper briefly while it grips.
Attach the larger petals in a second ring, staggering them so each one sits over a gap in the inner layer. Turn the flower as you work and check its outline from above. If one side looks crowded, shift the next petal rather than forcing more paper into that spot. Wrap a narrow strip of crepe paper around the gathered bases and upper stem to conceal the joins. Let the glue dry before bending petals into their final positions; damp joins can loosen when handled.
Adjust the shape and avoid common mistakes
A flower that looks flat may need more cupping in the center of its petals, not more petals. If the bloom looks like a tight cone, gently open the outer layer and curl a few edges outward. Bulky bases usually mean the petals were cut too wide at the bottom or too much glue was used. On your next flower, trim the bases narrower and apply glue only where the paper meets the stem.
If petals tear while shaping, try smaller stretches and support the paper closer to the area you are pulling. If they droop, use a sturdier crepe or reduce the size of the outer petals. Keep finished flowers away from moisture, which can soften the paper or affect its color. Once you are comfortable with the basic method, vary petal width, curl direction and the number of layers to create different flower shapes from the same simple tools.


