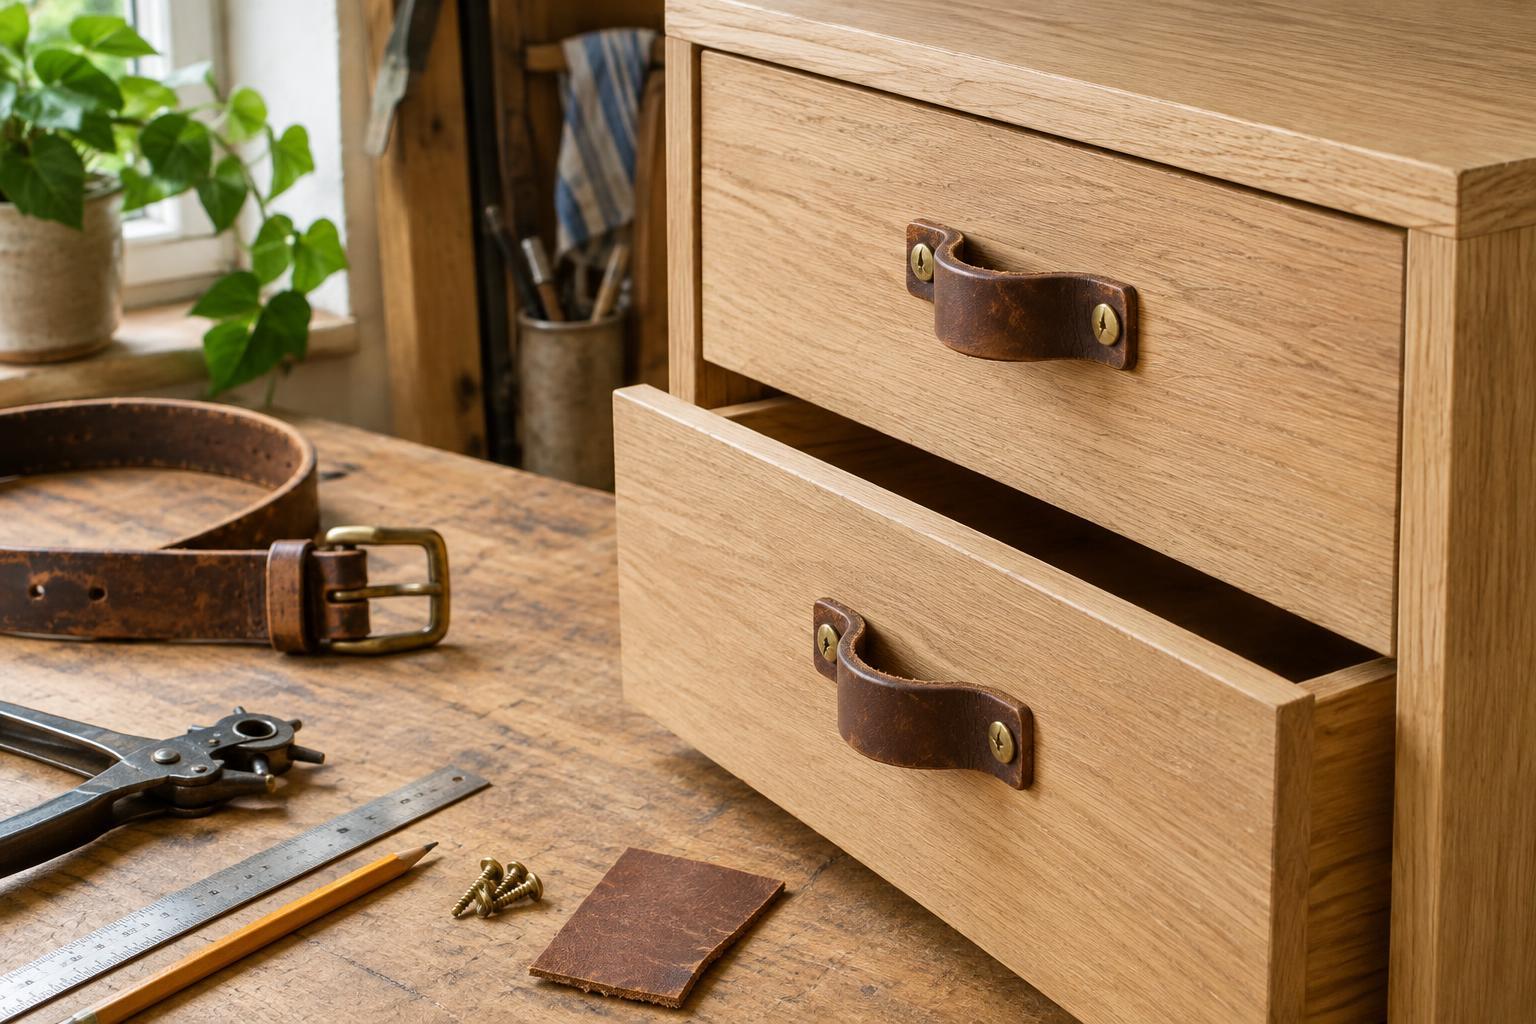
Choose a belt and plan the pulls
An old leather belt can make warm, comfortable cabinet pulls with little waste. Start with a belt that bends without cracking and feels sturdy enough to withstand repeated pulling. Avoid sections with deep splits, weak stitching, or stretched holes. If the belt has a coated surface that is peeling away, the pulls may continue to shed material during use.
Decide whether you want a short loop fixed at one point or a flat strap fixed at both ends. A loop is useful when you have only one existing hardware hole. A two-point strap spreads the pull across a wider area and works well on drawers. Check how much space you have around each door or drawer before cutting: a long loop may catch on a neighboring front, while a strap mounted too flat can be difficult to grip.
Measure the usable length of the belt and divide it by the number of pulls you need. Set aside the buckle end, damaged areas, and any factory holes you do not want visible. If you want the pulls to match, make a paper pattern for one strap and test it against every cabinet front.
Gather materials and prepare the leather
You will need the belt, a ruler, pencil or removable marking tool, sharp utility knife or heavy scissors, cutting mat, and a hole punch or leather awl. For installation, gather a drill, suitable bit, and hardware that fits both the leather and the cabinet front. Machine screws with washers and nuts can work for through-mounting; low-profile screw posts are another option when they are long enough for the combined thickness. Choose hardware that leaves no sharp ends exposed inside the cabinet.
Wipe the belt with a slightly damp cloth and let it dry fully. Avoid soaking it, which can leave leather stiff or misshapen. Cut one sample strap first, using several controlled passes with a knife rather than trying to force a thick belt through in one cut. If the cut edges feel rough, smooth them lightly with fine sandpaper. An optional leather edge finish can help tidy the appearance, but let it dry before mounting.
Keep the belt's original width for a simple look, or narrow every strap using the same pattern. Rounded corners are less likely to catch than sharp ones. If an old belt hole falls close to a new mounting hole, choose a different section rather than weakening the attachment point.
Mark the holes before drilling
For a two-point pull, hold the strap against the cabinet front and curve it outward until your fingers fit comfortably underneath. Mark both mounting points on a paper template. Transfer those marks to the leather, keeping each hole far enough from the cut end that the leather will not tear around it. Punch clean holes sized for the hardware; forcing an oversized screw through a tiny hole can distort the strap.
Next, mark the cabinet. If you are replacing a pull, check whether the existing holes suit your new design. Do not assume every drawer has identical spacing: measure each one. For new holes, use the template to keep the placement consistent, and check the inside of the front for drawer boxes, shelves, or other obstructions. A small piece of masking tape can make pencil marks easier to see without marking the finish.
Drill slowly with a bit sized for the chosen hardware, using a scrap-wood backing block where possible to reduce splintering as the bit exits. If you are unsure how the finish will respond, test your drilling method on an inconspicuous or spare piece first. Clear away dust before fitting the pull.
Attach and test each pull
Position the leather on the outside of the cabinet and pass the fasteners through the punched holes and cabinet front. Add washers where needed to spread the load, then secure the hardware from the inside. For a loop pull, bring both ends together at the mounting point and confirm that your fastener is long enough for the doubled leather. Tighten until the pull sits firmly, but stop before the hardware crushes or cuts into the strap.
Open and close the cabinet several times, pulling as you normally would. The leather should not twist around its fasteners, rub heavily against the finish, or block a neighboring door. Check that the interior hardware clears the drawer contents and that nothing sharp can snag a hand. If a pull shifts, adjust the fit or hardware rather than relying on glue as the main attachment.
Keep the pulls looking good
Dust the pulls with a soft cloth and wipe spills promptly. Leather may change color where hands touch it most, so expect some variation over time. Check the fasteners occasionally and retighten them if regular use has loosened them. If a strap develops a split near a mounting hole, replace it before it tears through.
Use these pulls where they will not be repeatedly soaked or exposed to persistent moisture. Save leftover sound sections of the belt for a matching pull or a future repair. The most successful set is not necessarily perfectly uniform: careful cutting, comfortable spacing, and secure mounting matter more than hiding every sign of the belt's earlier life.


