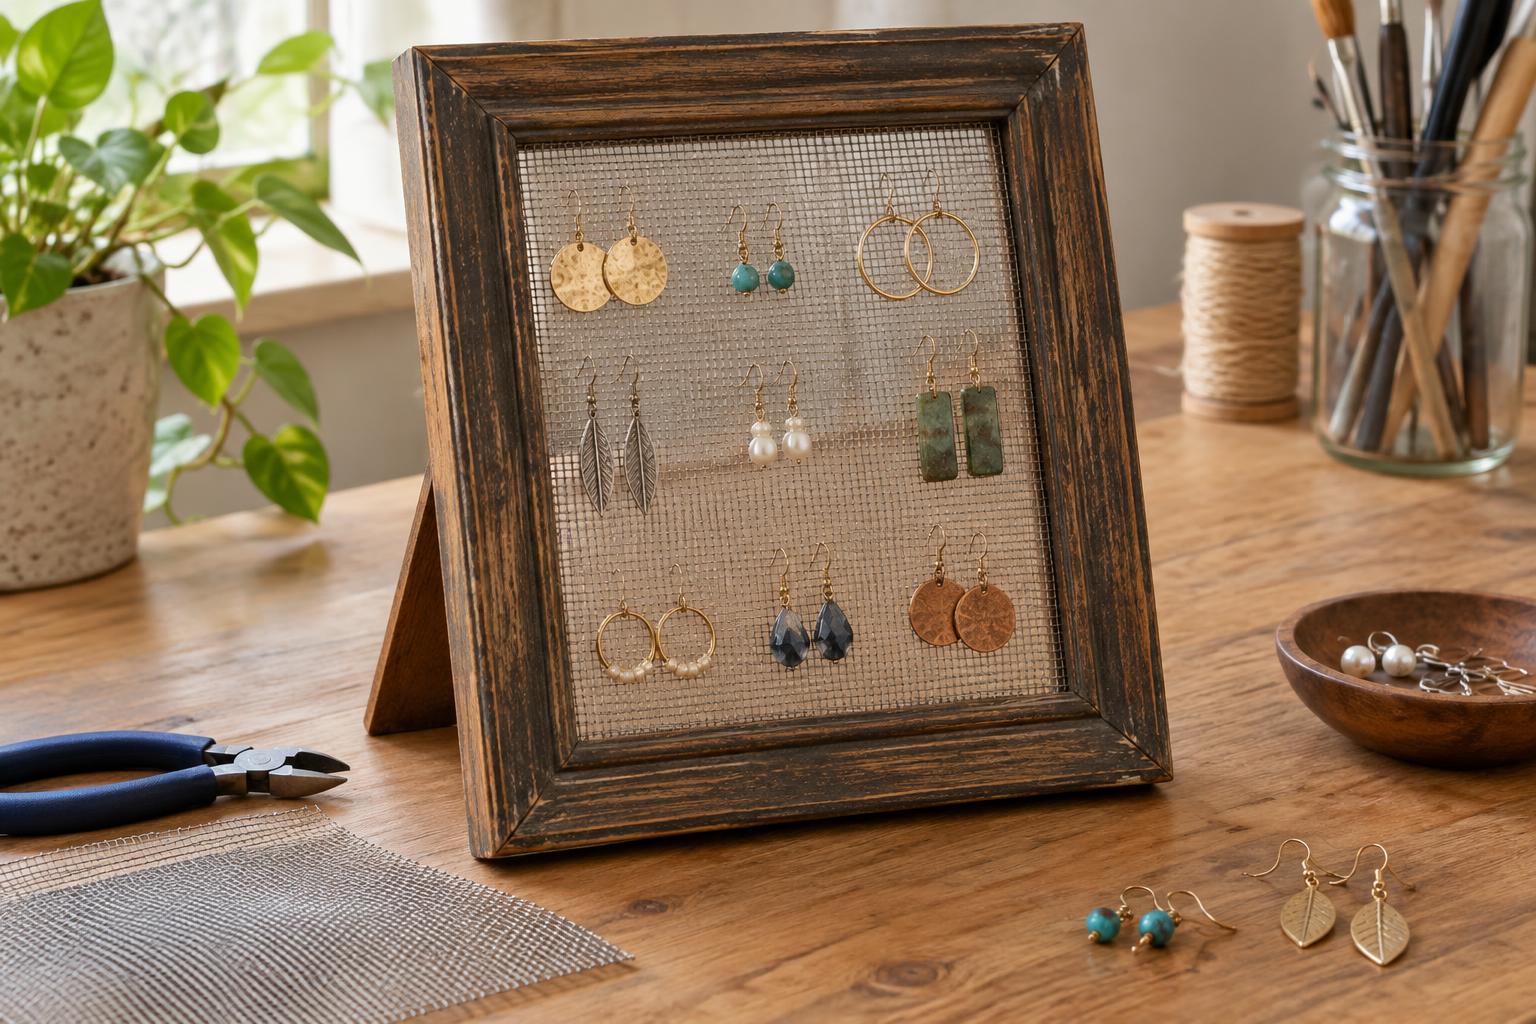
Choose a frame and a suitable insert
An old picture frame can become an earring holder with one useful change: replace the picture and glass with a surface that earrings can hang from. A small tabletop frame works well for a modest collection, while a larger frame offers more space between pairs. Choose a frame that feels sturdy, has no loose corners, and has a back opening you can reach easily. Check its existing stand or hanging hardware before deciding where the finished holder will go.
For the insert, consider plastic canvas, firm decorative mesh, or fine wire mesh. Hooks need openings large enough to pass through without being forced. Stud earrings also need space behind the insert so you can attach their backs. Plastic canvas is easy to cut and has regular holes; wire mesh can look more delicate but may leave sharp cut ends. If you plan to display heavier earrings, choose a firm insert and a frame that can hold it without flexing.
Gather supplies and prepare the frame
You will need the frame, your chosen insert, a ruler, pencil, scissors suitable for the insert, and a way to secure it. Depending on the frame, small staples, short tacks, or strong craft glue may work. Keep a piece of stiff cardboard handy to protect your work surface. If you want to change the frame’s appearance, you can also use paint and a brush. Check that any new fastening method suits the frame’s material and thickness before you begin.
Remove the backing, artwork, and glass. Set the glass aside safely; it is not needed for this project. Wipe dust from the frame, check for splinters or rough patches, and make any cosmetic changes before fitting the insert. Let paint or glue dry fully before handling the frame again. Finally, measure the inside opening and the rear ledge where the insert will sit. The insert should overlap that opening enough to be fastened securely.
Cut and attach the insert
Lay the insert flat and mark its cutting line using your measurements. Cut carefully, then test-fit it in the back of the frame. Trim a little at a time if needed: an insert cut too small may slip through the opening. If you are using wire mesh, handle the cut edges cautiously and bend or cover any exposed points that could snag fingers or jewelry.
Place the frame face down on the protected work surface. Position the insert against the rear ledge, keeping its rows reasonably straight if the pattern is visible. Fasten one side, pull the insert gently taut, and secure the opposite side. Work around the remaining edges without pulling so hard that the mesh distorts. Staples or tacks should sit in solid frame material and should not protrude through the front. If using glue, hold the insert in place as directed by the glue’s instructions and allow it to cure before testing. An unsecured edge can lift when you remove an earring, so check the whole perimeter.
Make room for the earrings you own
Hook earrings are straightforward: pass each hook through an opening and leave enough space below it for the earring to hang freely. Arrange long pairs toward the bottom or sides so they do not tangle with shorter ones. For stud earrings, push each post through a hole and attach its back from behind. If the frame sits flush against a wall, remove it to reach the backs, or add suitable spacers so there is room behind the insert.
Before filling the holder, test it with one or two pairs. Lift the frame by its stand or hanging hardware and check that the insert stays in place. A tabletop frame should stand steadily without tipping when earrings are added. If you hang the frame, use hardware appropriate for its weight and your wall, and avoid loading one side with all the heaviest pieces. This project is best for earrings that hang comfortably from the chosen openings; forcing thick posts through small holes may damage the insert or the jewelry.
Fix common problems and keep it useful
A sagging insert usually needs firmer fastening or a stiffer material. If earrings catch on the surface, look for rough cut edges, loose threads, or openings that are too tight. If studs are awkward to fasten, increase the space behind the insert rather than pushing their posts harder. Check the frame’s stand, wall hardware, and insert occasionally, especially after moving the holder or adding heavier pairs.
The most useful layout is the one that matches your collection. Leave a few empty openings between delicate pairs, group frequently worn earrings where they are easy to reach, and move long styles apart if they overlap. With a sound frame and a securely fitted insert, an unused object becomes a simple way to see and store the earrings you already have.


