Choose scraps and gather your tools
Handmade paper begins with pulp: small paper fibers suspended in water. Plain printer paper, uncoated envelopes, notebook pages and tissue paper are useful starting materials. Mix a few types if you like, but begin with pale, unprinted scraps if you want a light-colored sheet. Dark ink, colored paper and craft scraps can make attractive flecks, though their colors may blend into a duller shade than expected.
Remove staples, tape, plastic windows and adhesive-backed labels. Set aside glossy magazines, waxed or plastic-coated paper and thermal receipts; their coatings can make the pulp harder to work with. If you plan to use an electric blender, keep it for crafts rather than returning it to food preparation.
You will need a shallow basin, a fine mesh screen stretched tightly over a frame, a second frame if available, absorbent cloths or reusable towels, a sponge and a flat board or tray. A second frame, called a deckle, helps give the sheet neat edges, but you can form paper without one. Protect your work surface: this is a wet project.
Soak and break down the paper
Tear the scraps into small pieces and cover them with water in a bowl. Let them soak until they soften; thicker paper generally needs longer than thin tissue. Stir and squeeze a few pieces. If they still feel like intact paper, leave them in the water a little longer.
Blend a small amount of soaked paper with plenty of water in short bursts until it becomes a loose, even pulp. Follow the blender’s instructions, keep hands away from the blades and unplug it before cleaning. Without a blender, you can work very soft paper by hand, squeezing and stirring until the pieces break down, although the finished sheet may have a coarser texture.
Pour the pulp into the basin and add enough water for it to move freely when stirred. A thin mixture is easier to distribute evenly than a thick clump. Start with a small batch: you can add more pulp if the first sheet is too thin, but removing excess pulp from a crowded basin is awkward.
Form a sheet on the screen
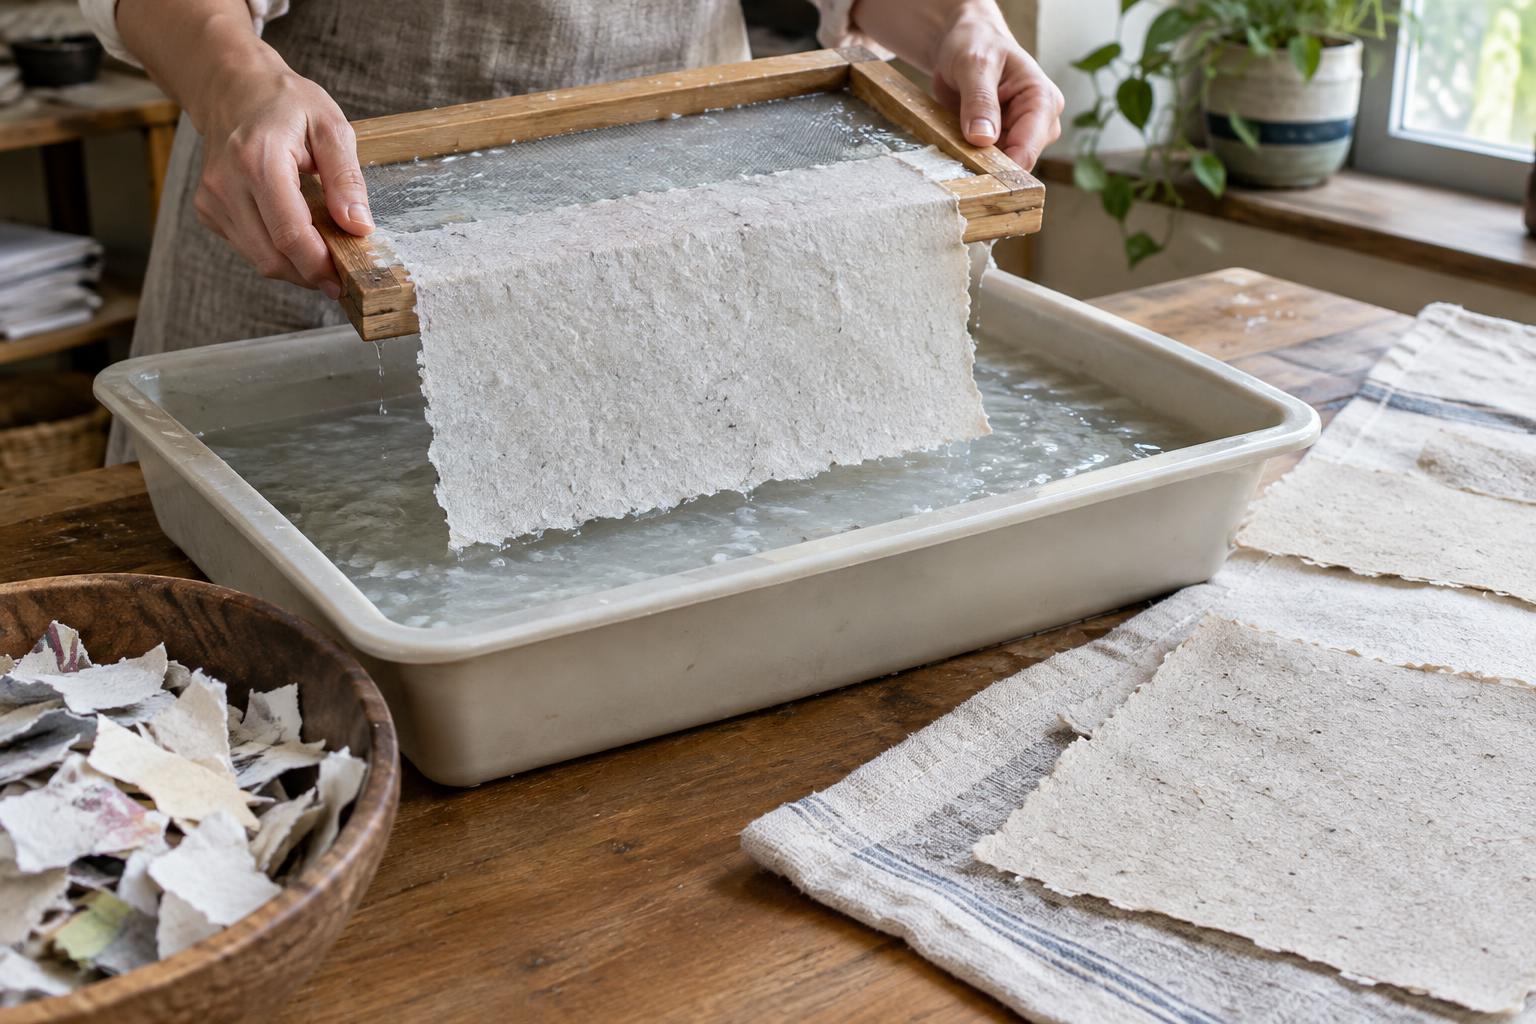
Stir the basin just before each sheet so the fibers do not settle. Hold the screen level, with the deckle on top if you are using one. Slide it beneath the surface, then lift it steadily through the water. The fibers should collect across the mesh. Give the frame a small, gentle shake from side to side while the water drains; this can help spread the pulp and link the fibers.
Let the screen drain over the basin. If you see a large bare patch, return the pulp to the water, stir and try again. For decorative flecks, add a small amount of torn colored tissue or dried petals to the pulp before lifting. Keep additions sparse: too many large pieces can leave weak spots in the sheet. A thinner layer of pulp makes a lighter sheet, while a thicker layer makes a sturdier but slower-drying one.
Transfer, press and dry
Lay an absorbent cloth flat. Remove the deckle, then turn the screen face down onto the cloth. Press the back of the mesh with a sponge to draw out water, paying particular attention to the edges. Lift one corner of the frame slowly. If the wet sheet sticks to the mesh, lower it again and sponge a little more before trying to peel the screen away.
Place another cloth over the sheet and press it between flat boards, or use a stack of towels and gentle, even pressure. Change damp cloths if needed. Then leave the sheet on a dry cloth or other suitable flat surface until it is completely dry. Drying time depends on thickness, airflow and room conditions; avoid stacking damp sheets, which can stick together and may develop an unpleasant smell.
When dry, ease the paper away from the cloth and flatten it under a book if it has curled. Handmade sheets often have soft edges and a slightly uneven surface. Test a small mark with your chosen pen before making a card or writing a long note, since absorbent paper may cause some inks to spread.
Improve the next batch
If your sheet tears during transfer, try a slightly thicker layer of pulp, finer blending or more careful sponging. If it dries lumpy, stir the basin more thoroughly and lift the screen at a steadier angle. Sheets that remain soggy may need more pressing or better airflow, rather than extra heat.
Save usable leftover pulp for another sheet, but do not pour a thick slurry down the drain, where fibers can collect. Strain it through a sieve or cloth and put the solids in the appropriate local waste stream. Once you can make a consistent sheet, experiment with paper colors and pulp thickness one change at a time. That makes it easier to see what produces the texture and strength you want.


