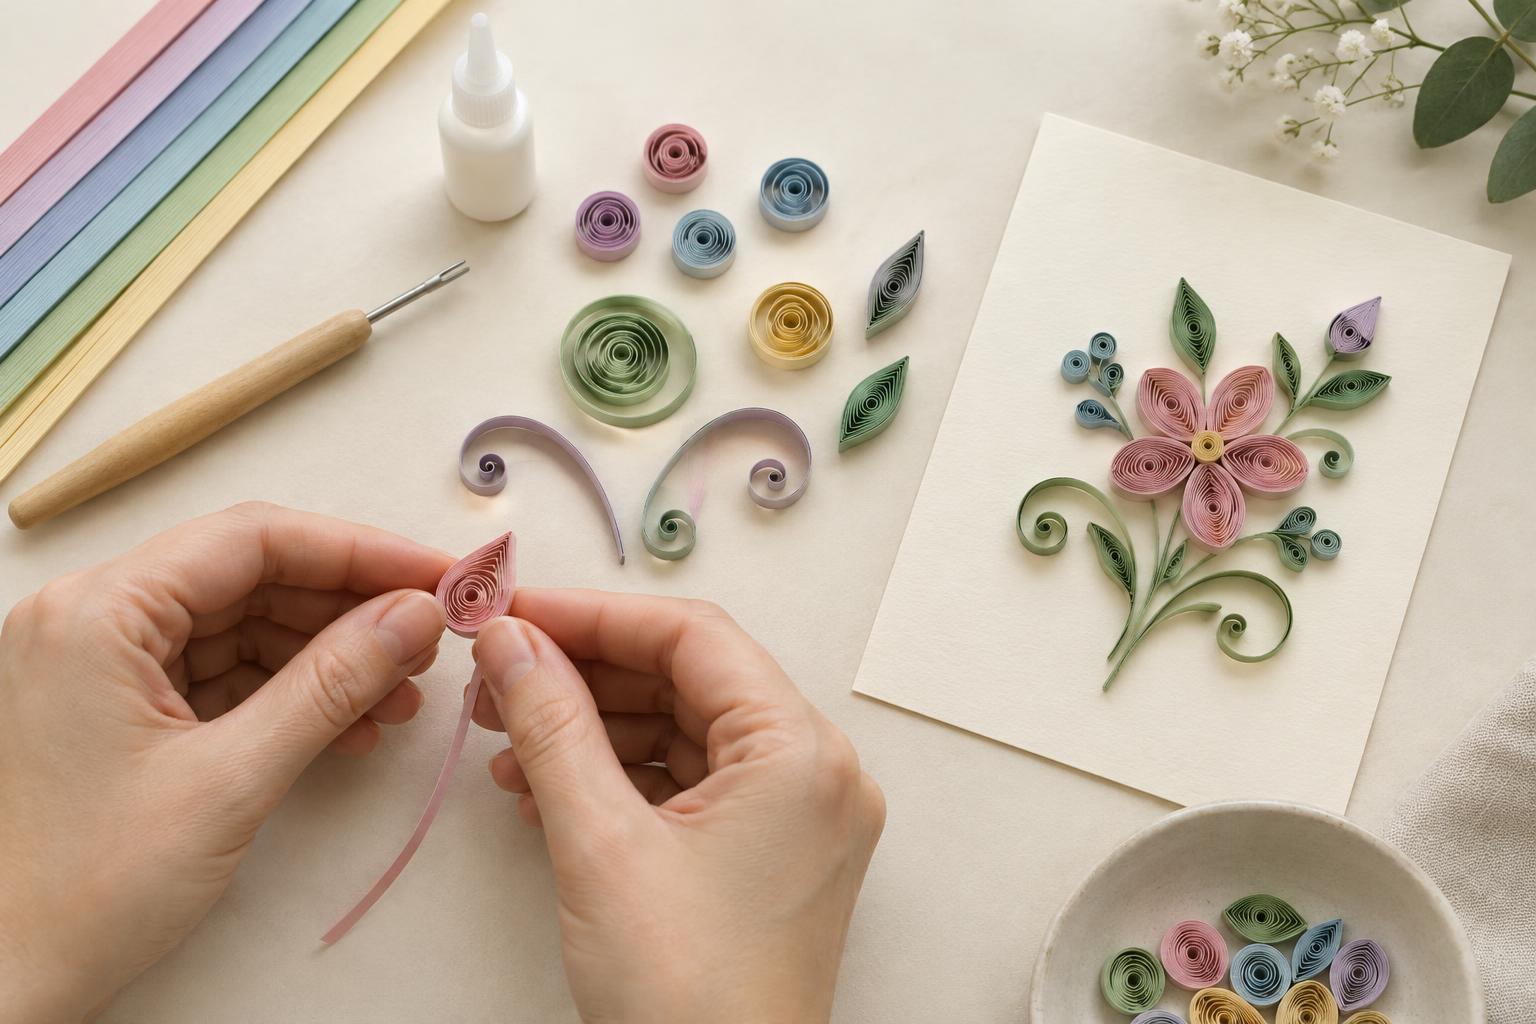
Gather a few supplies and prepare your strips
Paper quilling turns narrow strips of paper into shapes that can be arranged on a card, picture or decorative object. You can begin with pre-cut quilling strips, a slotted quilling tool, paper glue, a toothpick and a firm piece of cardstock for your backing. Tweezers help place small shapes, but they are optional. A ruler and a cutting mat are useful if you plan to cut your own strips.
For a first project, choose strips of the same width and a paper weight that bends without creasing sharply. Very thin paper may be hard to control, while stiff cardstock can resist tight curves. If cutting your own, aim for straight, consistent strips; uneven widths make shapes harder to align. Cover your work surface with scrap paper so stray glue does not reach the finished piece.
Before gluing anything to the backing, sketch a small, simple outline or arrange a few loose strips as a guide. Flowers, leaves and swirls are good practice because they can use the three shapes in this guide without requiring every piece to match perfectly. Keep your hands clean and dry: damp fingers can soften paper and make the edges look untidy.
Roll tight coils and relaxed coils
To make a coil, slide one end of a strip into the slot of the tool. Hold the strip gently between a finger and thumb, then turn the tool so the paper winds around its tip. Guide the strip as it rolls rather than pulling it tight. When you reach the end, slide the roll off the tool while holding its center so it does not spring apart suddenly.
For a tight coil, keep the paper wound closely and secure the outer end with a tiny dot of glue. Tight coils can become flower centers or small accents. For a relaxed coil, place the roll on your work surface and let it expand before gluing its outer end. Try releasing several coils in the same-size circle of a quilling template if you want them to match. Without a template, compare them side by side and adjust before adding glue.
Use less glue than you think you need. Touch a toothpick to the bottle, then transfer a small amount beneath the outer tip. Press briefly and allow the join to hold before shaping or placing the coil. A large blob of glue can flatten the paper or leave a shiny mark.
Turn a coil into a teardrop
Start with a relaxed coil whose outer end has been glued. Hold its center in place with one hand and gently pinch one side between the fingers of your other hand. The rounded side becomes the body of the teardrop; the pinched point can serve as the tip of a petal or leaf. Pinch once with steady pressure rather than repeatedly squeezing the same spot, which can crease several layers unevenly.
You can shift the inner spiral slightly toward the point for a more expressive shape, or leave it centered for a tidy, balanced look. Make a few teardrops from equal-length strips and arrange them around a tight coil to test a simple flower. If the petals vary in size, check whether you gave each coil the same room to expand before gluing its end. Small differences are fine, but consistent preparation makes a planned design easier to assemble.
Shape open scrolls without sealing the ends
Scrolls differ from closed coils because at least one end remains free. For a single-ended scroll, roll part of a strip around your tool, slide it off and let it loosen. Leave the unrolled length straight or curve it gently with your fingers. The result can look like a curling stem. Unlike a relaxed coil, you do not glue the outer end to close the spiral.
To make an S-shaped scroll, roll one end of a strip toward the middle, then roll the other end in the opposite direction. Release both curls and adjust them until their sizes feel balanced. For a C-shaped scroll, roll both ends toward the middle from the same side of the strip. Work slowly when removing each curl from the tool so you do not pull the first one out of shape.
If a scroll keeps unwinding, try a slightly shorter strip or wind the curled portion more firmly before releasing it. Avoid coating the whole strip with glue to make it stay put. When you attach it to a backing, small glue touches at a few contact points are usually enough to hold the intended curve.
Arrange and attach a first quilled design
Try a small card design: place a tight coil in the center, surround it with five or six teardrop petals, and add one or two open scrolls as stems or decorative flourishes. Arrange all the pieces dry first. Step back to check spacing, then move one piece at a time to a glue-safe area while keeping the layout in mind.
To attach a closed shape, dab a thin line of glue along the paper edge that will touch the backing, then place it gently on the cardstock. For scrolls, add glue only where the curves need to make contact. Use tweezers or the tip of a toothpick to nudge pieces into position without pressing their raised edges flat. Let the design dry on a level surface before moving the card.
If a shape looks uneven, reshape it before it is glued down rather than trying to correct it on the backing. If glue squeezes out, use less on the next piece and allow the excess to dry rather than smearing it across the paper. Practising a handful of each shape first will make the final arrangement more enjoyable—and show you how much variation you can create from just three basic techniques.


